
CapCut is the fastest way to get a DiveHUD overlay onto your footage. It's free, runs on desktop and mobile, and handles blend modes without any extra plugins. This walkthrough uses the CapCut mobile app, and the desktop version follows the same steps.
What you'll need
- Your dive clip (any camera: GoPro, phone or action cam)
- A DiveHUD overlay exported as a black-background clip
- The free CapCut app
Step 1: Export your overlay from DiveHUD
In DiveHUD, generate a depth or time overlay for the dive you want and export it. You'll get a clip with your metrics on a solid black background. That black is what the blend mode drops out in a couple of taps, leaving only your metrics floating over the footage.
Step 2: Start a project and add your overlay
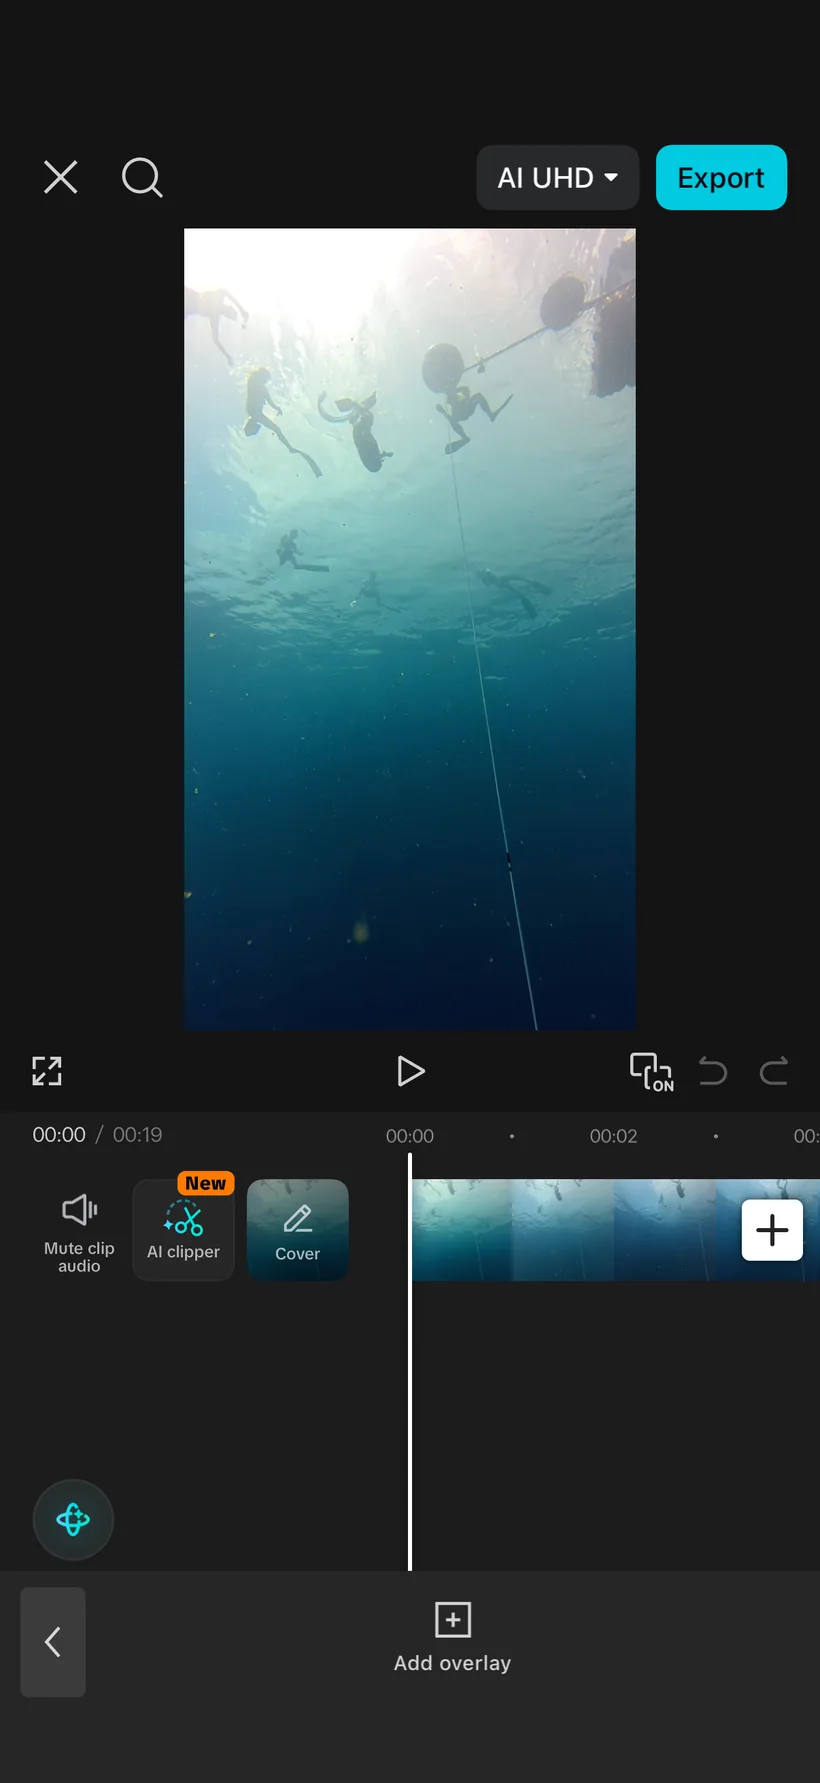
Open CapCut and start a new project with your dive clip on the main track. Tap Overlay, then Add overlay.
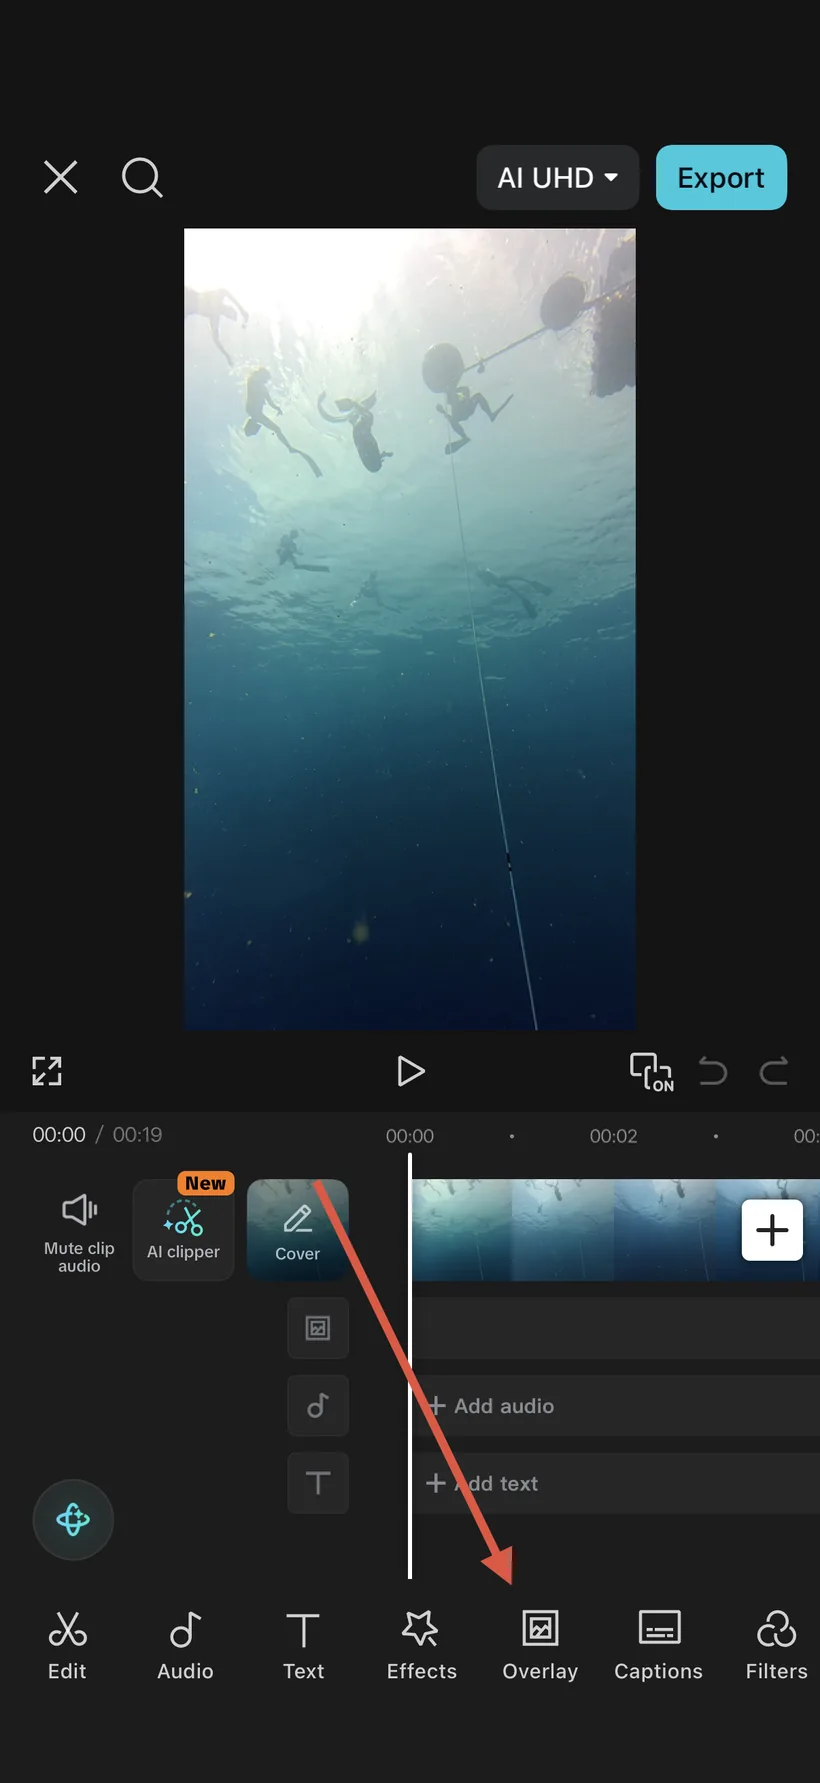
Choose the DiveHUD file you exported in Step 1.
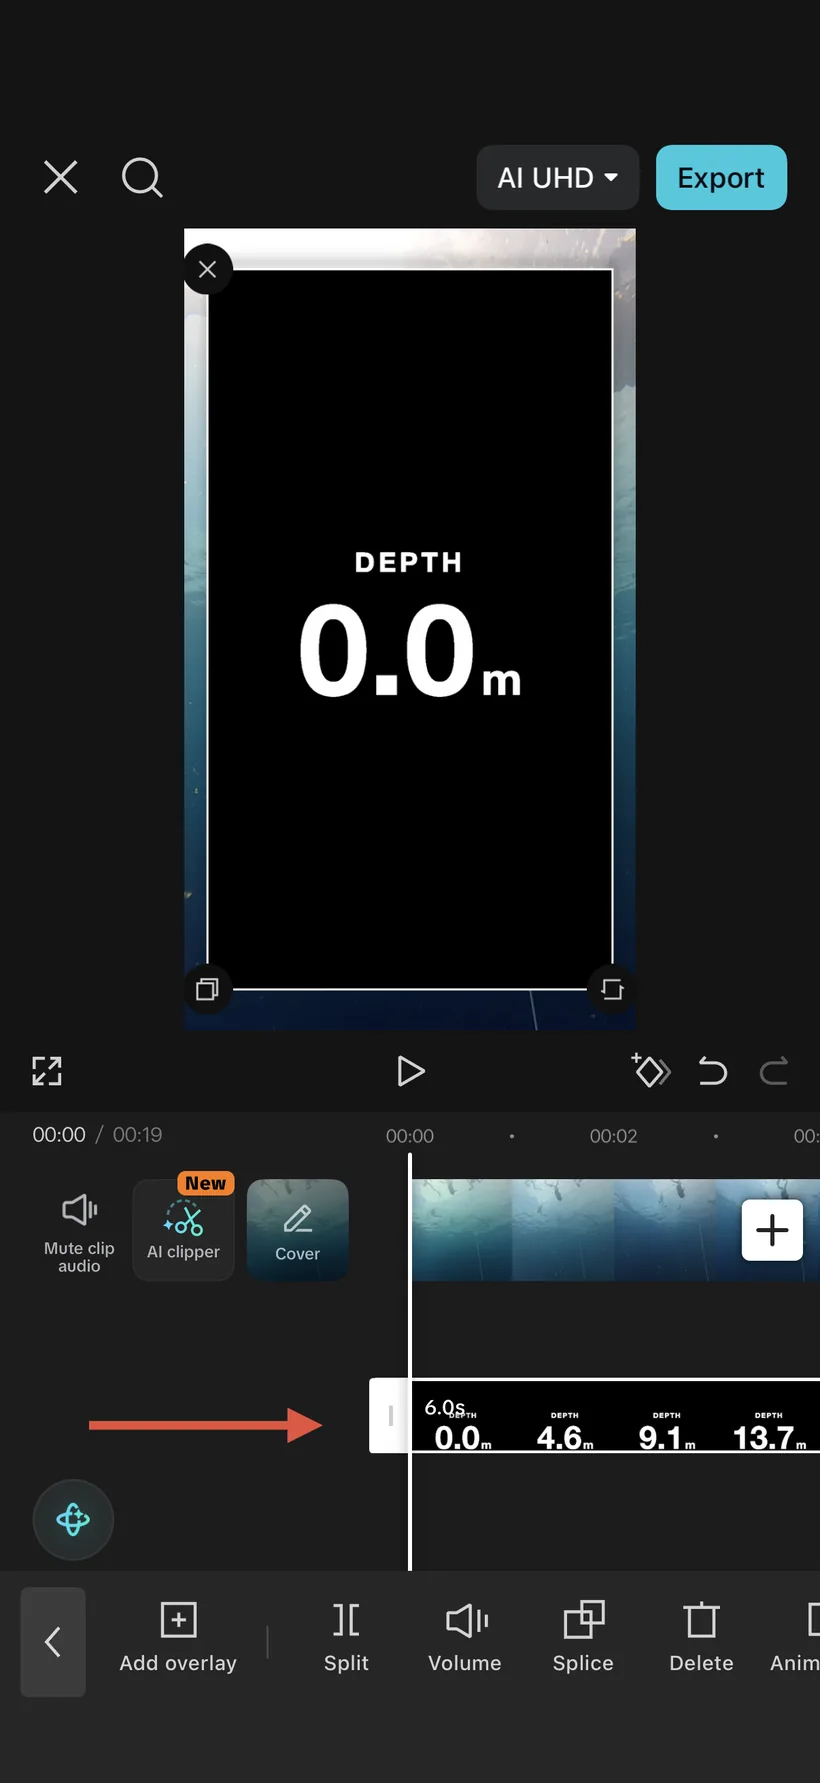
Step 3: Select the overlay layer
Tap the overlay clip on the timeline so it's the selected (active) layer. The blend controls only affect the layer that's selected.
Step 4: Open Splice and choose Lighten
With the overlay selected, open Splice in the bottom toolbar.
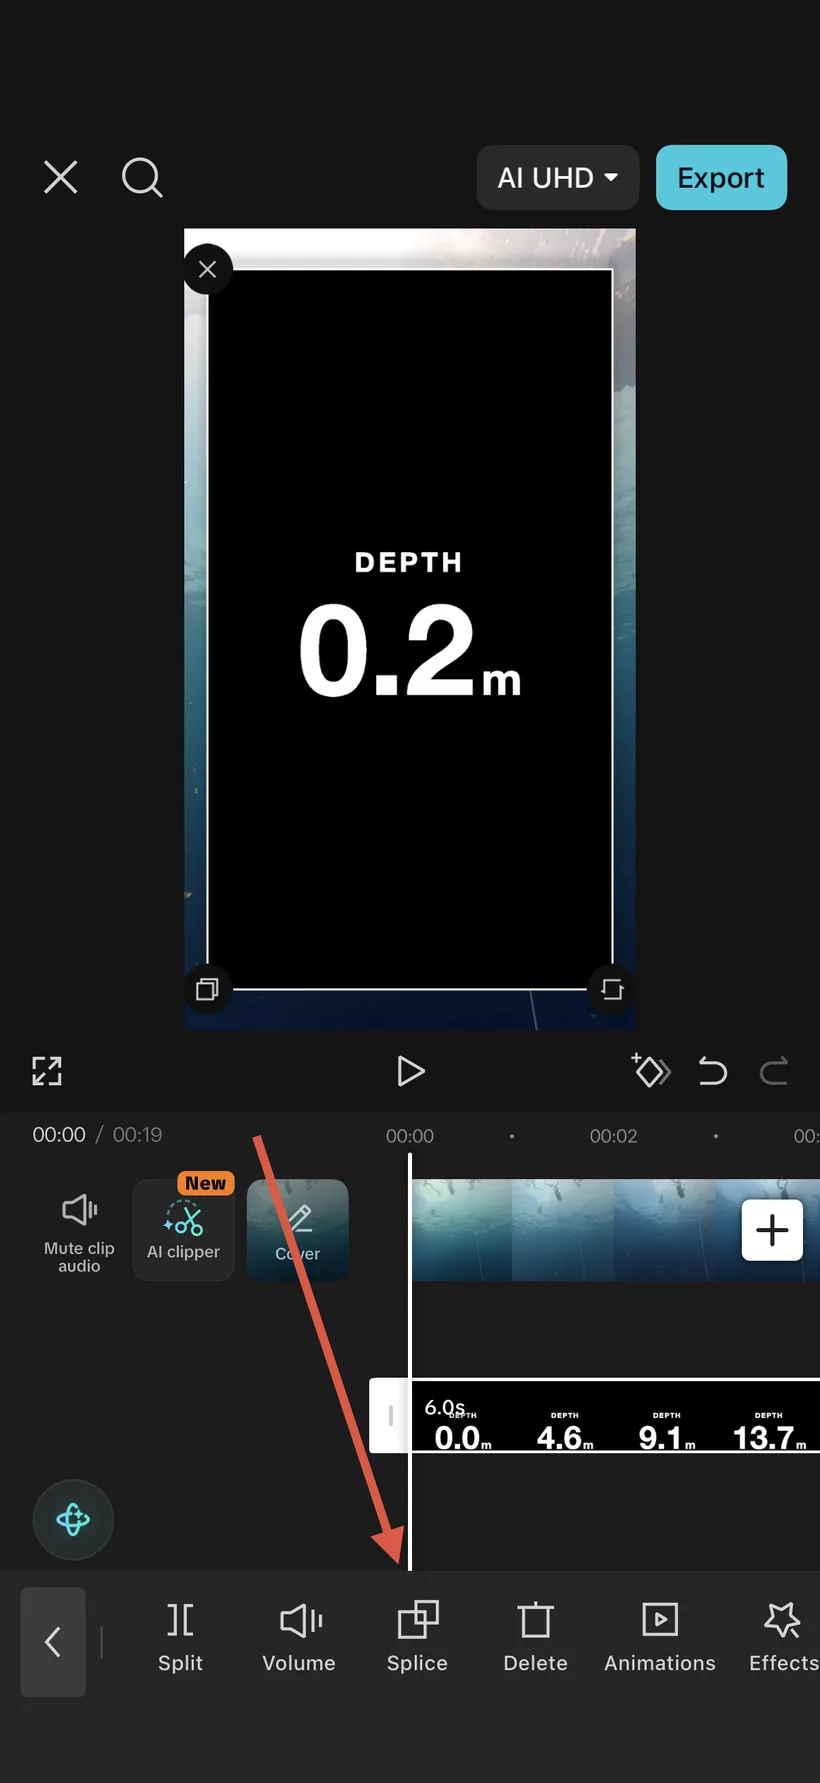
Set the blend mode to Lighten. The black background disappears instantly, leaving only your crisp metric graphics over the dive. It's far sharper than a green-screen key.
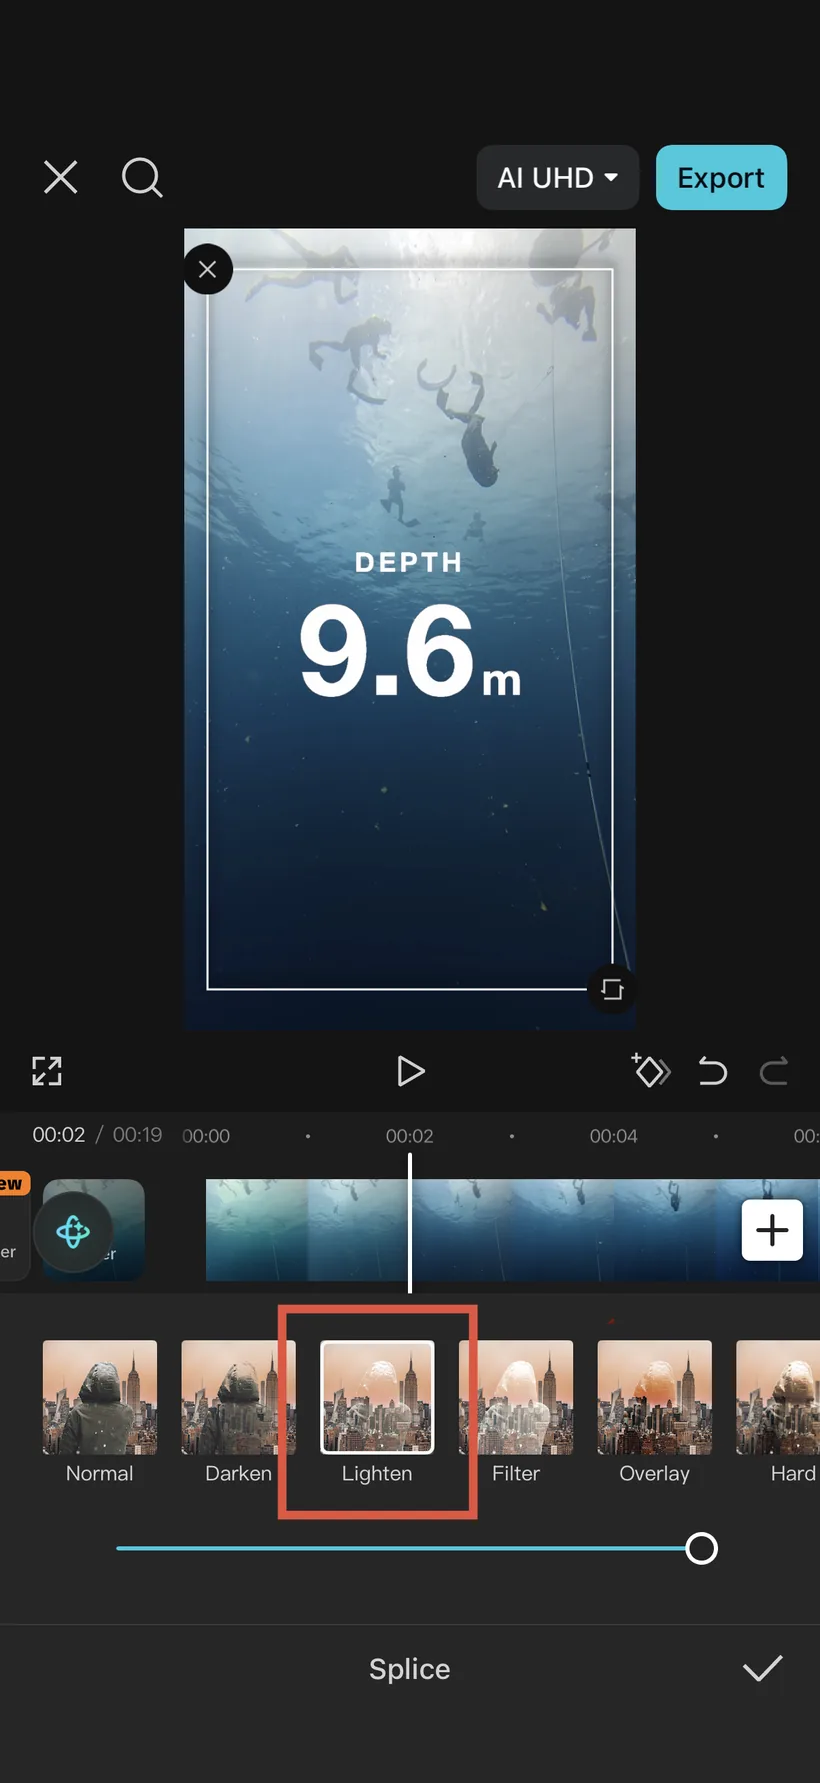
Lighten and Screen both drop a pure-black background cleanly, so either works here (Lighten is what's shown above). For the reason this beats chroma key on dive footage, read Screen blend vs green screen for underwater video.
Step 5: Resize and position (don't skip this)
This is the step that makes it look intentional, and it's easy to rush. With the overlay layer still selected, drag the corner handles to scale it and drag the clip to reposition it so the metrics sit exactly where you want. Usually that's the lower third or a corner, clear of your subject and matching your footage's framing.
Do this on a full-screen preview and check it at a few points in the dive, not just the first frame. As the depth number changes width, you want it to stay comfortably inside the frame the whole way through. Then line the overlay up in time with your footage (see Syncing your overlay to your footage), trim the ends, and export.
Bonus tip: play with blend styles
Lighten gives you the standard look: your metrics sitting on top of the footage. But the blend mode is where the creative options live. Scroll through the other Splice styles and you'll get completely different effects. One worth trying flips it around so the dive footage only shows through the numbers themselves, with everything else dark, so the metrics become a window into the dive rather than a layer on top of it. There's no single right answer here, so experiment and find a signature style for your reels.